This article is a part of:
Introduction
In the first part, we went through the deployment process of PNETLab on Google Cloud Platform using Terraform. The server was intentionally configured without Public IP address, preventing it accessible from the internet.
With this approach, we still need a way to access it securely. Normally, we would deploy a VPN server and configure it manually. However, we will use a zero configuration VPN solution from Tailscale.
This articles covers the Tailscale setup, advertise the appliance network to the Tailnet, and sharing the lab with other users within the Tailnet with least privilege principle. We will also configure a custom domain on the lab web interface.
Goals
- Secure access to the lab without exposing it to the public internet.
- Configure a domain name for easier access to the lab.
Prerequisites
- Tailscale accounts.
- Own a custom domain name.
Architecture Overview
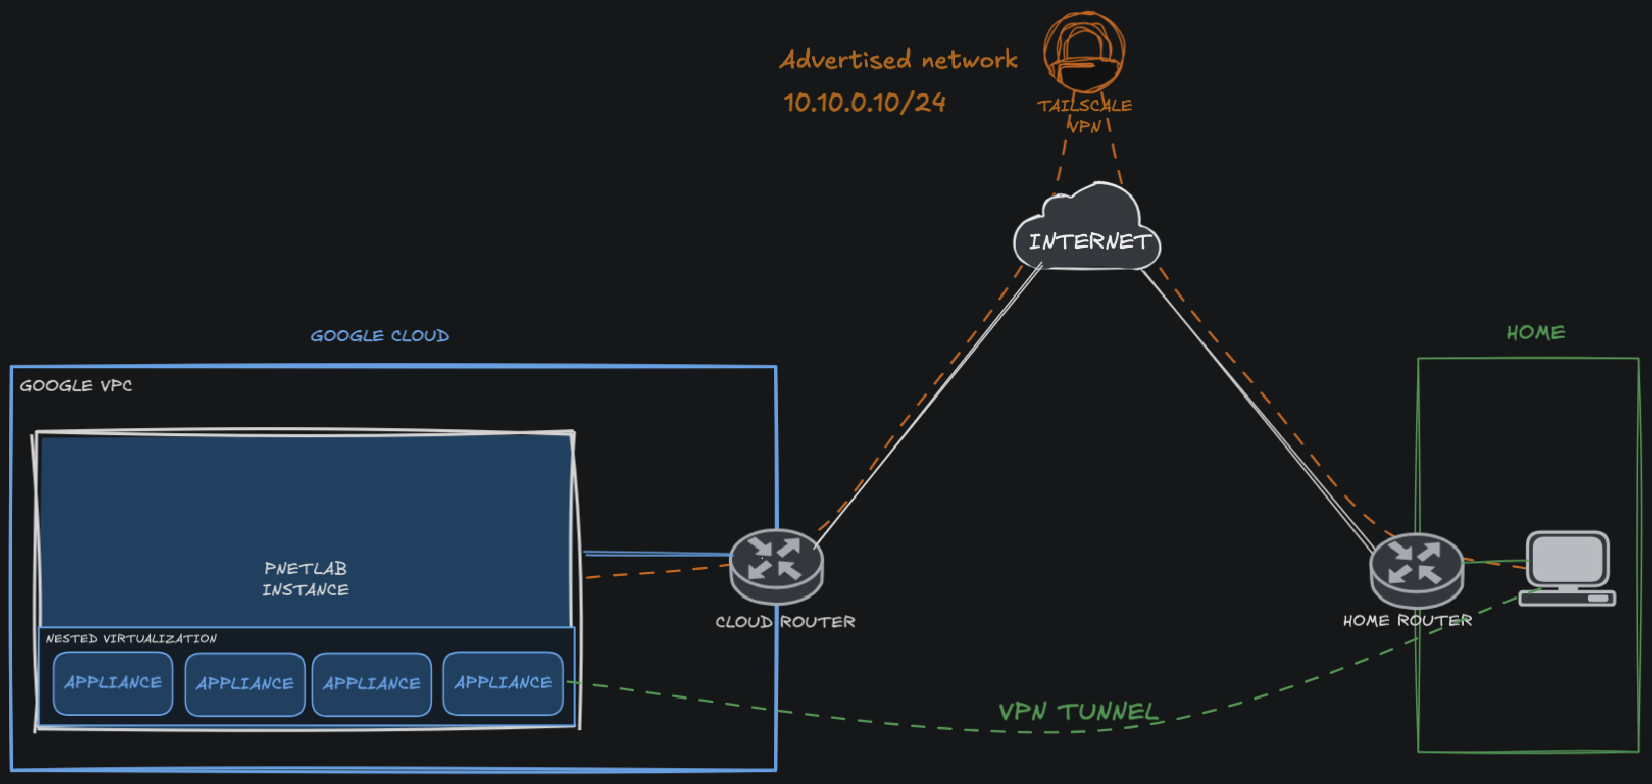
The setup consists of:
- Terraform for infrastructure automation
- A GCP compute instance running PNETLab
- A private VPC network
- Cloud Router for outbound internet access (dynamic IP)
- Tailscale for secure remote access to PNETLab instance
Tailscale Installation
To use the Tailscale VPN service, we need an agent like software to be installed in our server and your home devices that you are going to use to access the lab.
Install Tailscale
From the pnetlab server, install Tailscale with:
$ sudo curl -fsSL https://tailscale.com/install.sh | sh Verify installation
$ sudo systemctl status tailscaled | grep activeExpected outputs:
Active: active (running) since Thu 2026-05-28 15:54:08 UTC; 3min 25s agoJoining Tailscale Network
We will add the server to our Tailnet and get a private IP address assigned to it. You will also need to join your home devices to Tailnet!
Add Server to Tailscale Network
From the server, login into your Tailscale account via CLI:
$ sudo tailscale upExpected outputs:
To authenticate, visit:

	https://login.tailscale.com/a/random-string
Open the URL in a browser and perform the authentication with your Tailscale account.
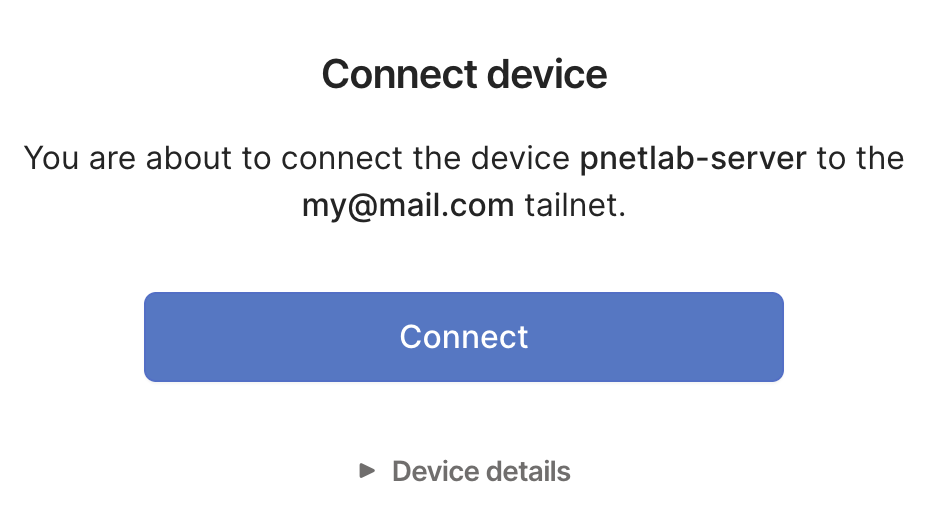
After completing authentication process, the server will join the Tailnet and receive a private Tailscale IP address and to see the assigned IP address, visit https://login.tailscale.com/admin.

Advertise PNETLab Network
By default, Tailscale only provides connectivity to the server itself. However, PNETLab appliances run within their own subnet. Therefore, to allow devices connected to the tailnet to reach those appliances directly, the PNETLab server need to be configured as a subnet router or simply turning the server into a router.
This will enable direct access between PNETLab appliances network (including docker) and our local network via the Tailscale network.
In this deployment, 10.177.0.0/16 is the internal network used by PNETLab for Docker containers. As an example, to advertise that subnet within the tailnet, we run the following command.
$ sudo tailscale up --advertise-route=10.177.0.0/16Note:
- The
--advertise-routes="10.177.0.0/16"option tells the instance to advertise the subnet10.177.0.0/16to your Tailscale network. Once approved and advertised, other devices in your Tailscale network can access the whole subnet through this instance.
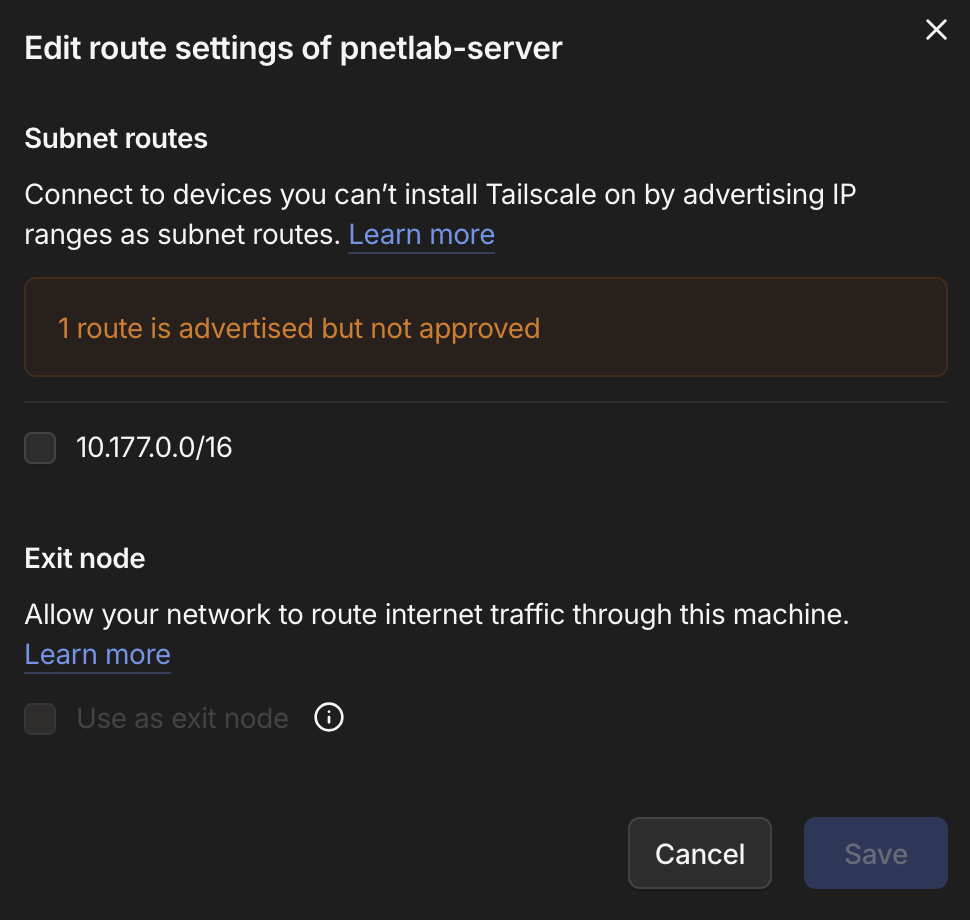
Visit your Tailscale admin panel and will see a Subnets label on the pnetlab server.

Open the node settings, select “edit route settings…” and tick the subnet.
From the PNETLab server, we then must enable the IP forwarding.
$ echo 'net.ipv4.ip_forward = 1' | sudo tee -a /etc/sysctl.d/99-tailscale.conf
$ echo 'net.ipv6.conf.all.forwarding = 1' | sudo tee -a /etc/sysctl.d/99-tailscale.conf
$ sudo sysctl -p /etc/sysctl.d/99-tailscale.conf
Verify
Now verify the subnet routing is working, try pinging the appliances subnet gateway from a device connected to the Tailnet. If the route succeeds, we should get the reply indicating the appliances subnet is reachable through Tailnet via PNETLab server.

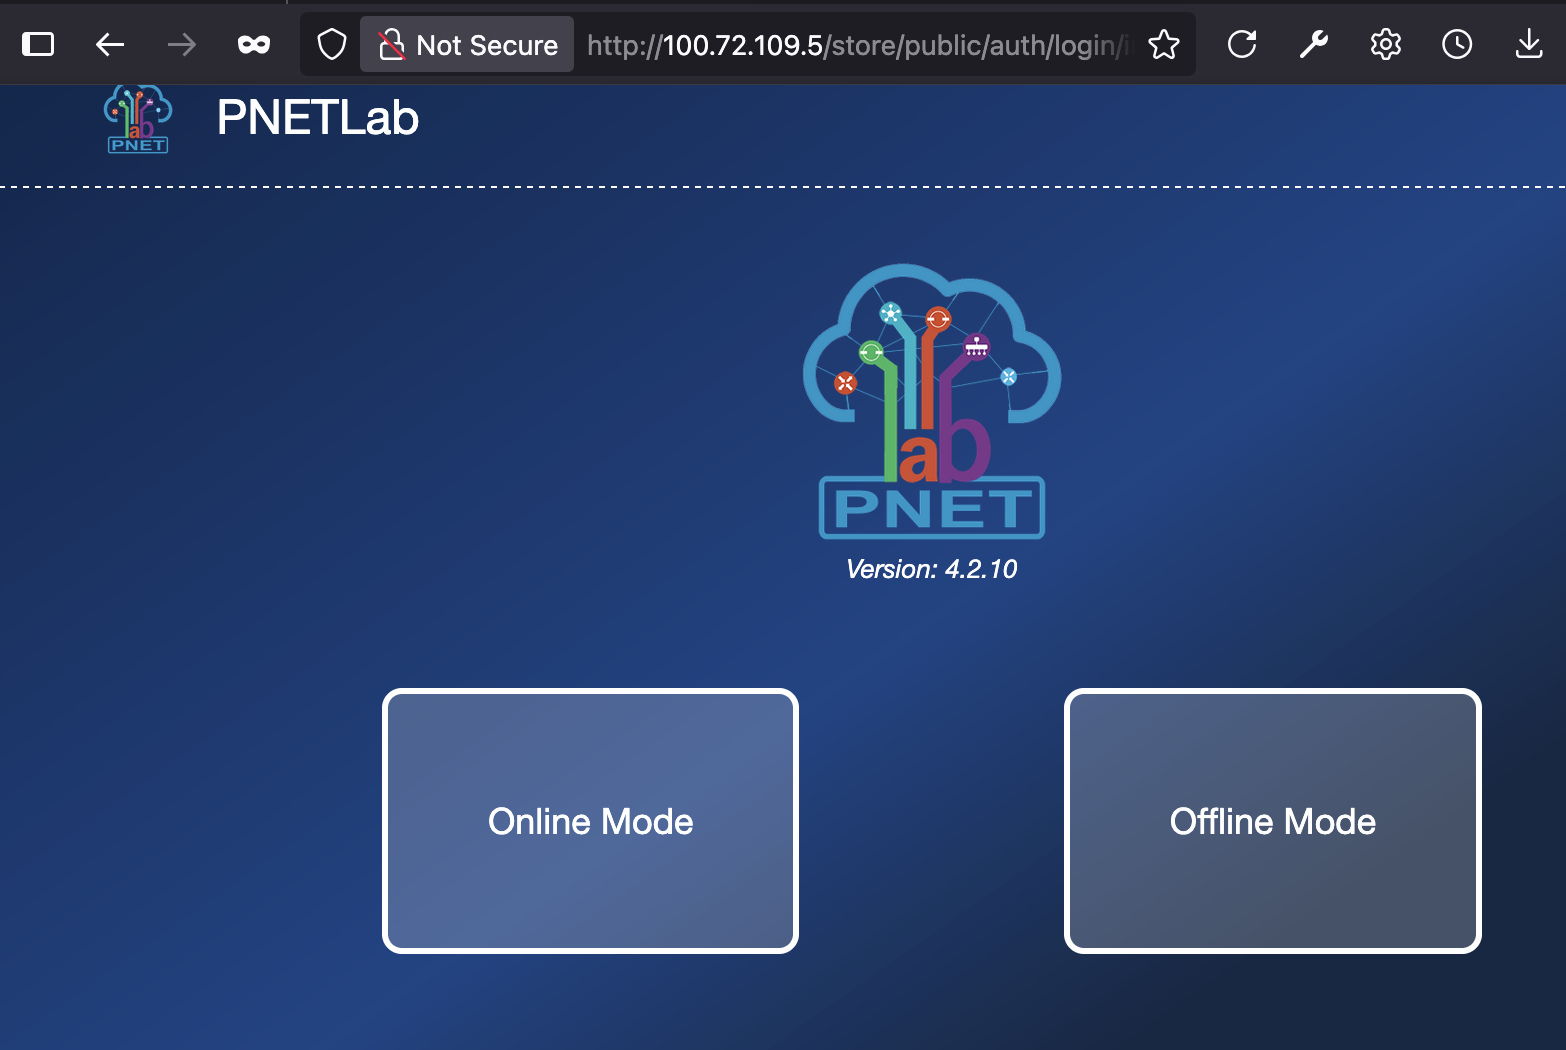
Now we can also access the PNETLab web interface either using the tailscale private IP address or the subnet you desired.
Note: I won’t go deep into neither the PNETLab web configuration nor appliance installation.
Sharing Access with Other Users
One of the reasons of using Tailscale is I can easily share access with other users for collaboration purposes.
The access itself can be controlled using ACLs, allowing users to access only the PNETLab server while restricting access to other devices within the Tailnet.
Example ACLs
In this example, User A is the Tailnet owner and User B is a collaborator. The goal is to allow User B to access the PNETLab only and lab appliances (within the advertised route). This could be simplified using the permission table below.
| Resource | User A (Owner) | User B (Collaborator) |
|---|---|---|
| PNETLab Web Interface | ✅ | ✅ |
| PNETLab Appliances Network (10.177.0.0/16) | ✅ | ✅ |
| Other Tailnet Devices | ✅ | ❌ |
| Tailnet Administration | ✅ | ❌ |
First, invite User B to the Tailnet from the Tailscale admin console. Once the invitation is accepted, create a collaborator group and add User B to it from the Access Control section.
"groups":
{
  "group:collaborator": ["UserB@mail.com"]
}
Next, create a lab tag
 "tagOwners": {
    "tag:lab": ["autogroup:owner"]
  }
Assign the tag:lab to the PNETLab node from the admin console.
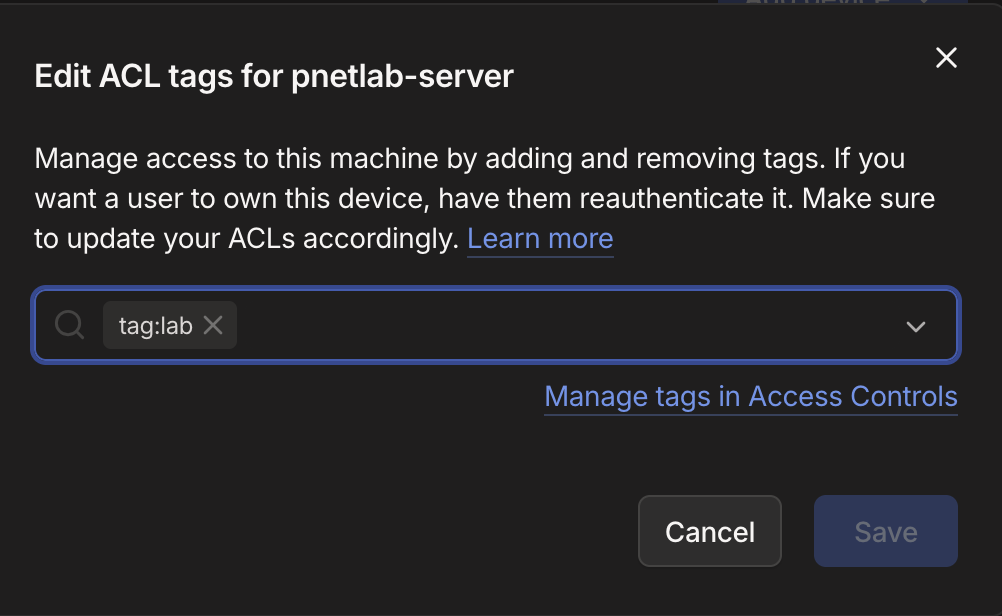
Then we grant members of the group:collaborator to access only devices tagged with tag:lab.
  "grants": [
    {
      "src": ["group:collaborator"],
      "dst": ["tag:lab"],
      "ip": ["*"]
    }
  ]
This ACLs rules ensure that the collaborator like user B would never reach anything outside the lab.
Configure Domain Name
This step is generally similar to configuring a custom domain for websites deployment. I will assume that you already own a custom domain and understand how to complete an ACME DNS challenge (proving control over a domain).
We will use SSL certificates from LetsEncrypts and then configure a new DNS record for a custom domain like: pnetlab.yourdomain.com. It’s just the record will be pointing to the Tailscale private IP of our PNETLab server.
Obtain LetsEncrypt SSL
First, install certbot and prepare the work folder.
$ sudo apt install -y certbotNext, get LetsEncrypt certificates by running the following command.
$ sudo certbot certonly --agree-tos --email admin@yourmail.com --manual --preferred-challenges=dns -d pnetlab.yourdomain.comExpected results:
Plugins selected: Authenticator manual, Installer None

- - - - - - - - - - - - - - - - - - - - - - - - - - - - - - - - - - - - - - - -
Would you be willing to share your email address with the Electronic Frontier
Foundation, a founding partner of the Let's Encrypt project and the non-profit
organization that develops Certbot? We'd like to send you email about our work
encrypting the web, EFF news, campaigns, and ways to support digital freedom.
- - - - - - - - - - - - - - - - - - - - - - - - - - - - - - - - - - - - - - - -
(Y)es/(N)o: no

... [SNIP] ...

Please deploy a DNS TXT record under the name
_acme-challenge.pnetlab.yourdomain.com with the following value:

dUQSpAWIqR10KEbL-VCyZzRmK9JJpM4vBd_FScBCfnI

Before continuing, verify the record is deployed.
- - - - - - - - - - - - - - - - - - - - - - - - - - - - - - - - - - - - - - - -
Press Enter to Continue
This step requires you to complete a ACME DNS challenge on your DNS provider (NameCheap, Hostinger, etc).
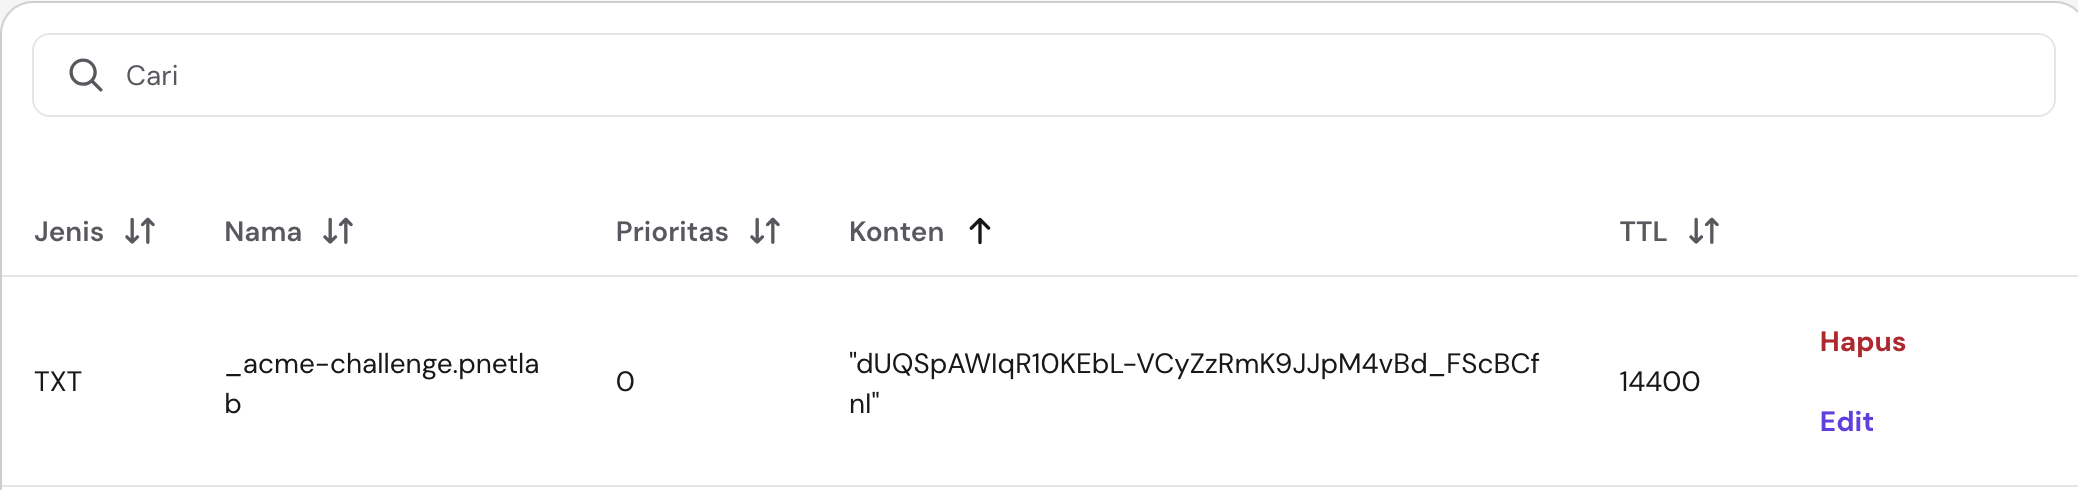
DNS TXT record
After successful validation, the CA (LetsEncrypt) will issue the certificates, which should be available at ./letsencrypt/config/live/yourdomain.com/ or /etc/letsencrypt/live/yourdomain.com/.
Configure a New DNS record
Go to your DNS hosting provider and add a new record with the following data:
- Type:
A - Hostname/Domain Name:
pnetlab.yourdomain.com - IPv4:
[PNETLAB TAILSCALE IP]
Here’s an example of mine, where I’m using Cloudflare for DNS management.
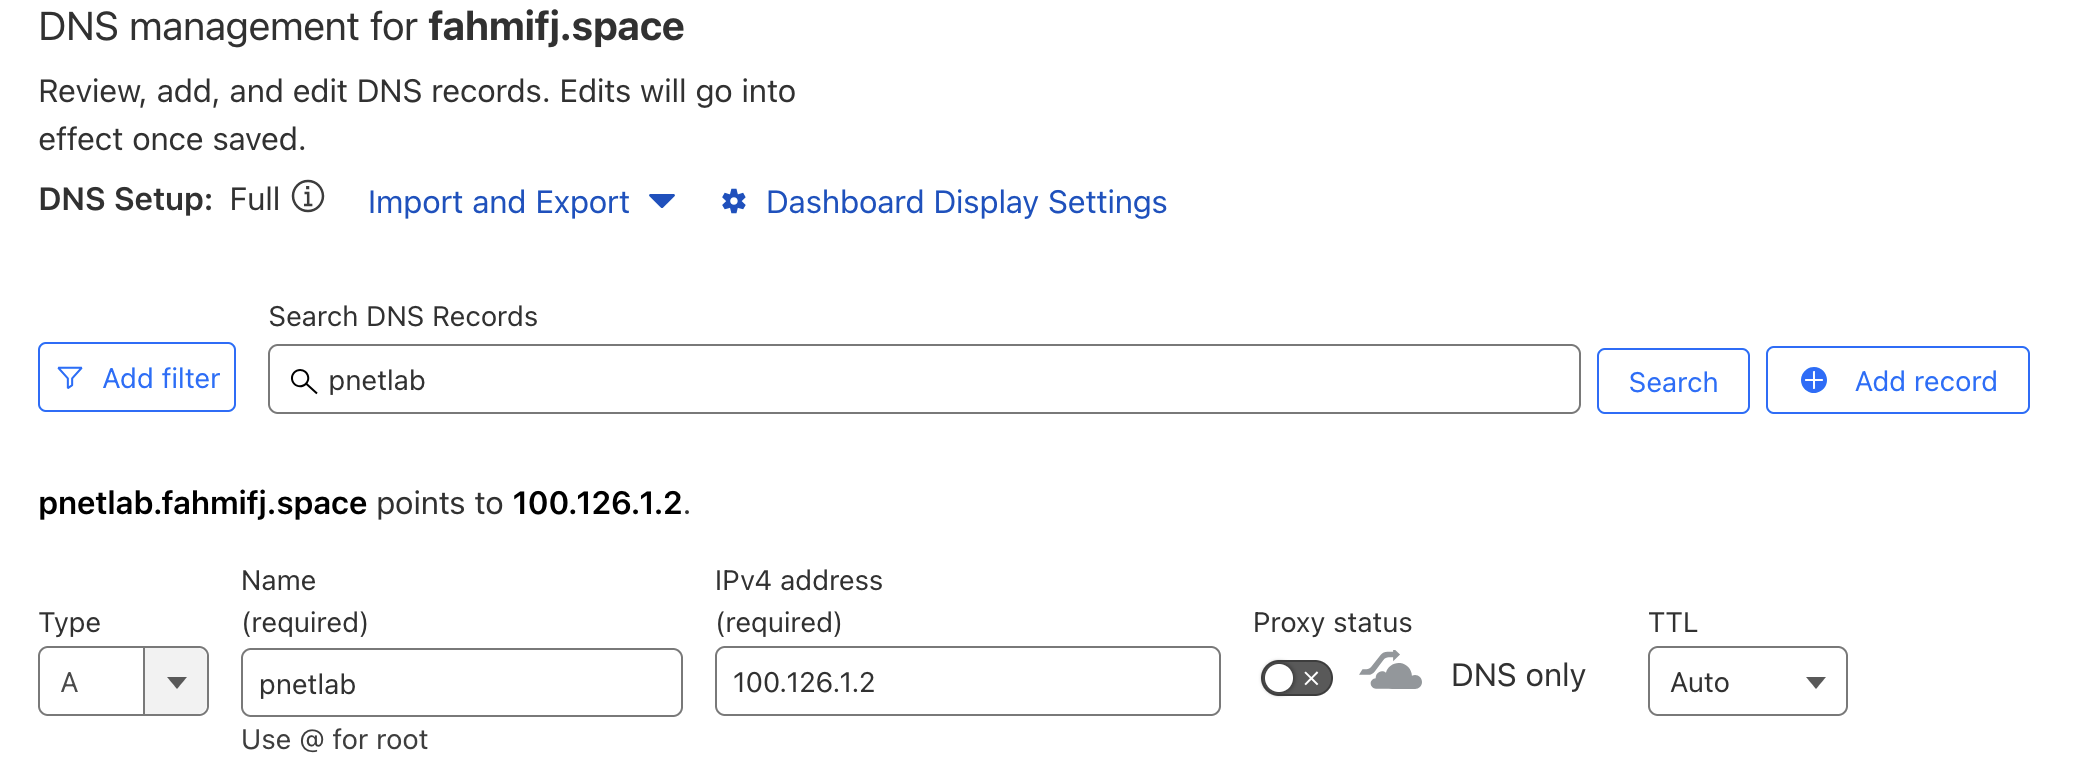
100.126.1.2 is the tailscale node IP of my pnetlab server.
Verify if your domain is mapped correctly using the dig command or Google Toolbox.
$ dig pnetlab.fahmifj.space
...[SNIP]...
;; QUESTION SECTION:
;pnetlab.fahmifj.space.	IN	A

;; ANSWER SECTION:
pnetlab.fahmifj.space. 300	IN	A	100.126.1.2
...[SNIP]...
Configure SSL Certificates
Now we have obtained the SSL certificates and pointing a custom domain to the PNETLab private IP, it’s time to configure the web server.
Open and edit the apache web config file: /etc/apache2/sites-available/pnetlabs.conf, then change these values with your certificate path.
SSLCertificateFile   /etc/letsencrypt/live/pnetlab.yourdomain.com/cert.pem
SSLCertificateKeyFile /etc/letsencrypt/live/pnetlab.yourdomain.com/privkey.pem
Restart the apache services
$ sudo systemctl restart apache2Verify
With all the required steps has been completed, we can verify the domain name configuration by accessing the PNETLab web interface from any device connected to the tailscale network.
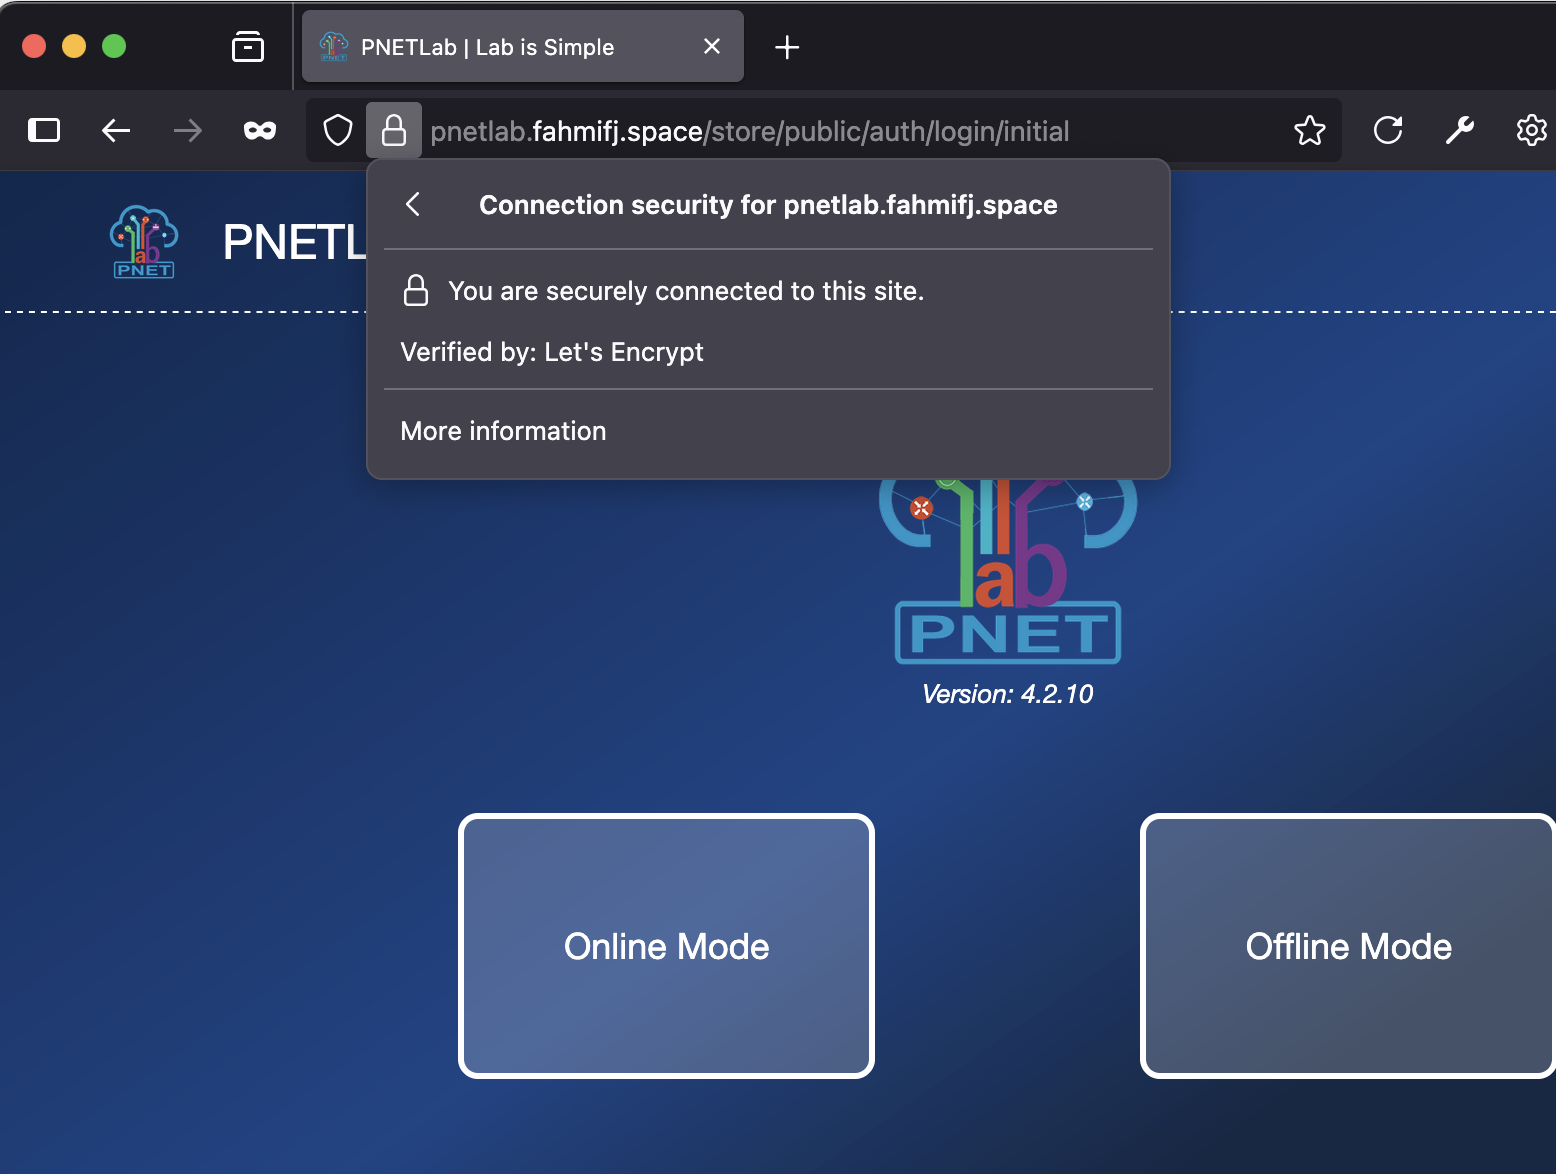
Accessing PNETLab using Domain Name
Troubleshoot
If you’re unable to install Tailscale, try removing these repo list from the apt sources:
$ sudo vi /etc/apt/sources.list
...
#deb [trusted=yes] http://repo.pnetlab.com ./
#deb [trusted=yes] http://i-share.top/repo ./
Conclusion
With Tailscale, we have secured access to the PNETLab server without the need to manage a dedicated VPN server. We only allow access to the lab from authorized devices.
Tailscale also makes it easy to share the lab with other users or colleagues. By enforcing ACL rules, access can be restricted to only the resources required for collaboration. This follows the least privilege principle where access is granted based on identity.