After using Kali 2019.4 for almost 2 years, I finally upgraded to version 2021.2 (fresh install). As a result, I had to reapply my settings and configurations on this newer version for playing HackTheBox (which I believe is applicable to other boot2root platforms as well). Therefore, I think it’s better to document my basic setup online. Hope it helps you as well.
Okay that’s enough for the intro, let’s set it up!
Displaying IP in Prompt
First, I would like to add an IP address in the shell prompt. Adding IP address in your prompt would be really helpful as it lets you copy the IP faster for reverse shell. To do so, we’ll need to modify the .zshrc file.
Before performing any modification, consider to make a backup of your original file using the following command:
$ cp ~/.zshrc{,.bak}
And then let’s create a custom section within the file using comments (I suggest placing it at the top).
# START CUSTOM
...[custom script here]...
# END CUSTOM
Now add the following function to your .zshrc file.
# START CUSTOM
...[SNIP]...
function get_ip(){
   # It can be thm or htb IP
   tunnel_ip=`ifconfig tun0 2>/dev/null | grep netmask | awk '{print $2}'`
   # Use eth0 as default IP,
   default_ip=`ifconfig eth0 2>/dev/null | grep netmask | awk '{print $2}'`
   if [[ $tunnel_ip == *"10."* ]]; then
      echo $tunnel_ip
   else
      echo $default_ip
   fi
}

...[SNIP]...
# END CUSTOM
The function assumes tun0 is the VPN interface to connect to HackTheBox network and eth0 is your default interface to connect to the Internet.
Then, find the following lines:
...
case "$PROMPT_ALTERNATIVE" in
        twoline)
...
Under these lines, replace the entire PROMPT variable with the following line:
PROMPT=$'%F{%(#.blue.green)}┌──${debian_chroot:+($debian_chroot)─}${VIRTUAL_ENV:+($(basename $VIRTUAL_ENV))─}(%B%F{%(#.red.blue)}%n$prompt_symbol%m%b%F{%(#.blue.green)})-[%B%F{reset}%(6~.%-1~/…/%4~.%5~)%b%F{%(#.blue.green)}]-%B%F{152}[`get_ip`]%b%f%F{%(#.blue.green)}\n└─%B%(#.%F{red}#.%F{blue}$)%b%F{reset} '
Reopen your terminal or type one of the following commands in the terminal.
$ zsh
$ source ~/.zshrc
And we’re done with displaying IP address in the shell prompt.

OpenVPN Connection with Alias
It’s tiring when you have to type
$ openvpn /path/to/config/file.ovpn
each time you want to connect to the VPN. So to make this easier we can leverage the alias command!
First let’s create a folder called .ovpnconfig in the home directory.
$ mkdir -p ~/.ovpnconfig
Then put all of your OpenVPN configuration files into that folder.

Finally, add some aliases into your .zshrc.
alias htbon='openvpn ~/ovpnconfig/htb-sg.ovpn 1>/dev/null &'
alias htbfort='openvpn ~/ovpnconfig/htb-fortress.ovpn 1>/dev/null &'
alias htbrel='openvpn ~/ovpnconfig/htb-release.ovpn 1>/dev/null &'
alias kvpn='pkill openvpn'
Now we can type $ htbon or $ thmon in the command prompt to connect to the VPN.
Want to turn off the VPN? Simply type $ kvpn !
A Problem with Alias
In this Kali Linux version (non-root login), the only problem is that openvpn must be executed with sudo, because it needs administrative permission to create a network interface (that’s the tun0) .
Because of how alias works in Zsh:
Every eligible word in the shell input is checked to see if there is an alias defined for it. If so, it is replaced by the text of the alias if it is in command position (if it could be the first word of a simple command), or if the alias is global. If the replacement text ends with a space, the next word in the shell input is always eligible for purposes of alias expansion.
When you run $ sudo htbon, it will not expand the aliased command to $ sudo openvpn ~/ovpnconfig/htb-sg.ovpn 1>/dev/null &, instead it will return something like sudo: htbon: command not found.
Therefore, the solution to overcome this is by also aliasing the sudo command.
Add the following alias to your .zshrc file.
alias sudo='sudo '
Additionally, if you want to use sudo with no password for the default user kali, we can create a new sudoers file by running the following command.
$ sudo visudo /etc/sudoers.d/kali
Then add the following line to gives user kali sudo permission with no password.
kali ALL=NOPASSWD: ALL
This time, we can run the alias command with sudo.
$ sudo <alias-command>
$ sudo htbon
Tools Transfer
Just like the OpenVPN files, I like to keep the essential tools to be centralized in one folder and so it can be hosted immediately. Again, we can create a folder called tools.
$ mkdir -p ~/tools
Put your tools inside the folder. The following are some of the tools that I think to be essential (including web-shell).
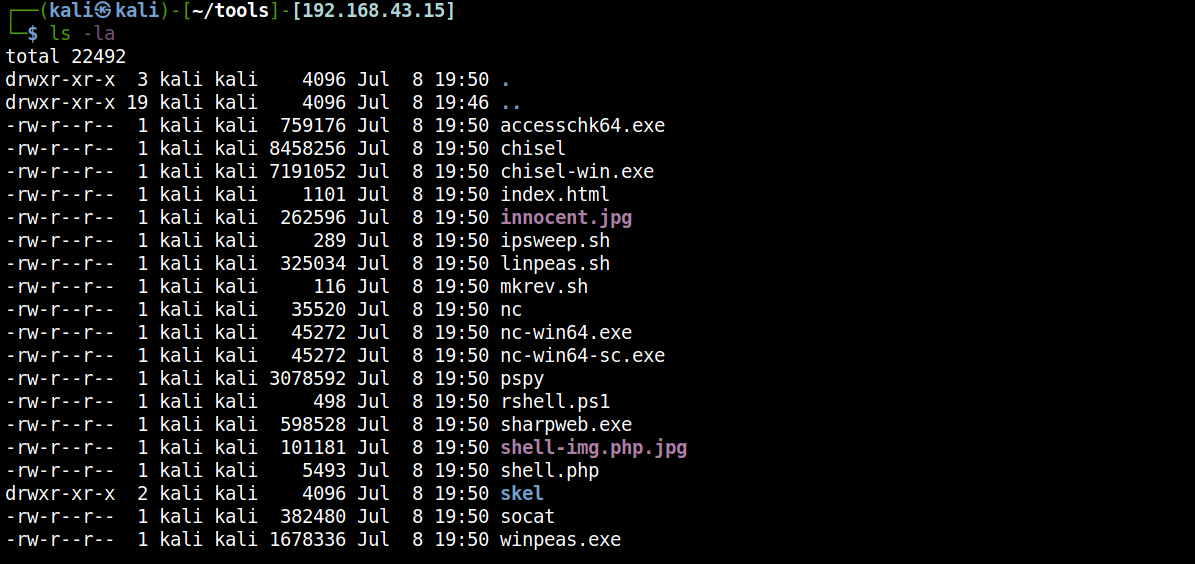
Next, add another alias to host these tools immediately with one command, feel free to create alias for yourself. Mine called hostit.
alias hostit='python3 -m http.server -d ~/tools 8000'
If you watch ippsec, he prefers keeping the tools with the associated pwned machines (in www directory). So it’s up to you.
Note Template
My current note template is available on GitHub. I’m using the following function to recreate the directory structure:
function mknote(){
  mkdir nmap gobuster loot logs exploits ssh-keys post-exploits
}
nmap: each nmap scan goes here.
gobuster: each gobuster scan goes here.
loot: each interesting file for further analysis goes here.
logs: If you like to log your activity with
$ script, put them here.exploits: exploit script goes here.
ssh-keys: obtained ssh-key goes here, not loot.
post-exploits: post-compromise loot goes here.
Usage is simple:
$ cd htb-machine-folder/
$ mknote
$ tree
.
├── exploits
├── gobuster
├── logs
├── loot
├── nmap
├── post-exploits
└── ssh-keys
SSH Configuration
I have always use a separate SSH keys for CTF. My SSH key for CTF is using ed25519. You can create one using the following command:
$ ssh-keygen -a 100 -t ed25519 -f ~/.ssh/ctf_ssh
After that, register your private key to SSH agent.
$ eval "$(ssh-agent -s)"
$ ssh-add ~/.ssh/ctf_ssh
Since HackTheBox machine starts with IP address of 10.10.*, add these lines to your SSH config (~/.ssh/config). Create one if you don’t have it.
Host 10.10.*
  IdentityFile ~/.ssh/ctf_ssh
With the config above, whenever I injected my public key (/.ssh/ctf_ssh.pub) to HackTheBox machine for persistence access, I don’t have to specify -i /path/to/ssh/private/key anymore, but just with $ ssh machine-name@hostname.
QTerminal Configuration
Unfortunately I’m not a tmux user here. Tmux is rich in features, but I’m not comfortable with its prefix key. So far, I’ve always used the default QTerminal application and leveraged its shortcut feature to ’navigate’ a slightly faster in terminal.
If you’re a Windows Terminal user, you’ll familiar with some of these shortcuts:
ALT + Arrows: Move cursor in subterminalCTRL + TAB: Navigate between tabsCTRL + Arrow Left: Previous tabCTRL + Arrow Right: Next tabCTRL + N: New terminal tabCTRL + SHIFT + W: Close current subterminalCTRL + SHIFT + =: Split terminal verticallyCTRL + SHIFT + -: Split terminal horizontallyCTRL + SHIFT + F: Open search bar in terminalCTRL + =: Zoom inCTRL + -: Zoom out
For me, the only limitation here is that there is no shortcut for resizing a subterminal.
Bundle Them with OMZ Plugin
If you’re a Oh My Zsh user like me, we can add these configurations (excluding SSH and QTerminal configurations) into a custom plugin.
Save the following script to /home/<username>/.oh-my-zsh/custom/plugins/ctf/ctf.plugin.zsh:
#!/bin/bash

function get_ip(){
   # It can be thm or htb IP
   tunnel_ip=`ifconfig tun0 2>/dev/null | grep netmask | awk '{print $2}'`
   # Use eth0 as default IP,
   default_ip=`ifconfig eth0 2>/dev/null | grep netmask | awk '{print $2}'`
   if [[ $tunnel_ip == *"10."* ]]; then
      echo $tunnel_ip
   else
      echo $default_ip
   fi
}

function mknote(){
  mkdir nmap gobuster loot logs exploits ssh-keys dump post-exploits
}

# https://askubuntu.com/questions/750419/how-do-i-run-a-sudo-command-needing-password-input-in-the-background
alias sudo='sudo -v; [ $? ] && sudo '
alias htbon='openvpn ~/ovpnconfig/htb-sg.ovpn 1>/dev/null &'
alias htbfort='openvpn ~/ovpnconfig/htb-fortress.ovpn 1>/dev/null &'
alias htbrel='openvpn ~/ovpnconfig/htb-release.ovpn 1>/dev/null &'
alias thmon='openvpn ~/ovpnconfig/thm.ovpn 1>/dev/null &'
alias thmwreath='openvpn ~/ovpnconfig/thm-wreath.ovpn 1>/dev/null &'
alias kvpn='pkill openvpn'
alias hostit='python3 -m http.server -d ~/tools 8000'
The next step depends on your theme. I use a theme called robbyrussell.
I created a copy of the theme in /home/kali/.oh-my-zsh/custom/themes/robbyrussell.zsh-theme. Then I modified the theme to display IP address and switched to two lines prompt.
NEWLINE=$'\n$'
PROMPT='%(?:%{$fg_bold[green]%}→:%{$fg_bold[red]%}→)'
PROMPT+=' %F{4}%n@%m %{$fg[cyan]%}«%c»%{$reset_color%}'
PROMPT+=' %B%F{152}«$(get_ip)»%f%b $(git_prompt_info)'
PROMPT+="%F{31}${NEWLINE} %f"

ZSH_THEME_GIT_PROMPT_PREFIX="%{$fg_bold[blue]%}git:(%{$fg[red]%}"
ZSH_THEME_GIT_PROMPT_SUFFIX="%{$reset_color%} "
ZSH_THEME_GIT_PROMPT_DIRTY="%{$fg[blue]%}) %{$fg[yellow]%}✗"
ZSH_THEME_GIT_PROMPT_CLEAN="%{$fg[blue]%})"
Finally, load the ctf plugin we created in .zshrc file.
...[SNIP]...
# Which plugins would you like to load?
# Standard plugins can be found in $ZSH/plugins/
# Custom plugins may be added to $ZSH_CUSTOM/plugins/
# Example format: plugins=(rails git textmate ruby lighthouse)
# Add wisely, as too many plugins slow down shell startup.
plugins=(git ctf)

...[SNIP]...
Restart your terminal and we’re done.

And that’s all for this post!